Want to set up your own NeoForge server and add mods to it? Look no further than this guide, where we will walk through all the steps necessary, from starting the NeoForge server to browsing and installing mods.
NeoForge is the newer successor of the Minecraft Forge mod platform. It offers numerous advantages over Forge such as better performance, faster updates, and new features. Most mods that formerly used Forge are switching over, so its good to familiarize yourself with the latest Minecraft mod platform.
1. How to Download and Install NeoForge
Go to the official NeoForge website or repository: NeoForge Releases.
Download the version of NeoForge compatible with your desired Minecraft version (e.g., NeoForge-<version>-installer.jar).
Navigate to the folder where you downloaded the NeoForge-<version>-installer.jar.
Run the installer:
- On Windows:
- Right-click the
.jarfile, select Open with, and choose Java(TM) Platform SE Binary.
- Right-click the
- On macOS, Open a terminal and navigate to the download directory then run “java -jar NeoForge–installer.jar”
Choose the installation type:
- Select Install Client to install NeoForge for playing mods.
- Ensure the Minecraft directory is correctly detected. If not, manually set the path (e.g.,
C:\Users\<YourUsername>\AppData\Roaming\.minecrafton Windows or~/.minecrafton macOS/Linux).
Click OK to start the installation.
2. How to Launch NeoForge
Open the Minecraft Launcher.
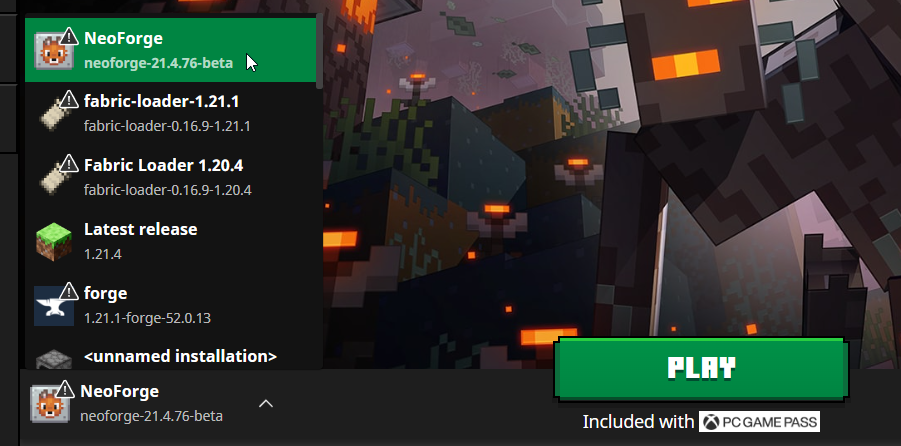
In the bottom-left corner, click the Profile Selector dropdown.
Select the new profile with NeoForge (e.g., NeoForge <version>).
Click Play to launch Minecraft with NeoForge.
3. How to start a NeoForge Server
You can easily start a NeoForge server using Campfire Hosting!
Simply click on the “Add Server” button and change the Server Type to NeoForge, and select which version you want. That’s it! A few clicks and you’re done.

4. How to Find and Download NeoForge Server Mods
Now we can focus on finding some mods for your new NeoForge Minecraft server! There are many websites out there for this purpose, but the top two websites are Modrinth and Curseforge. Most major mods are hosted on these two websites so you shouldn’t need much else.
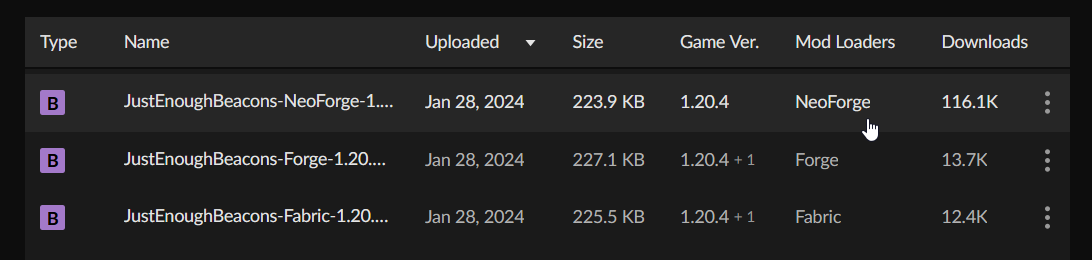
One important thing to note is that when browsing for mods, make sure you are only looking at mods that are compatible for the game version you selected! Also select the NeoForge option under Loaders.

Any mods you download you will want to verify that the file you selected is for the correct version of Minecraft along with verifying that it is for the NeoForge mod platform.
5. Installing Minecraft Mods on a NeoForge Server
To get started with NeoForge mods, we’ll walk you through the installation process. Mods are downloaded as .jar files. As the server owner, you need to take two steps for each mod you download:
Install the mod on your own computer and install it on the server
To Install NeoForge Mods on Your Own Computer:
- Locate Your
.minecraftFolder:- On Windows:
- Press Windows Key + R to open the Run window.
- Type
%appdata%in the text field and press OK.
- On Mac:
- Click on the desktop, press Command + Shift + G, type
~/Libraryin the search bar, and press Enter. - Navigate to
Application Supportand then tominecraft.
- Click on the desktop, press Command + Shift + G, type
- On Windows:
- Access or Create the
modsFolder:- Inside the
.minecraftfolder, look for a folder namedmods. - If it doesn’t exist, create a new folder and name it
mods.
- Inside the
- Add the Mod:
- Drag and drop or copy the
.jarfile for the NeoForge mod you downloaded into themodsfolder.
- Drag and drop or copy the
To Install NeoForge Mods on the Server:
- Access Your Server Files:
- Connect to your server using an SFTP client (e.g., FileZilla or WinSCP). If you’re unfamiliar with this, refer to our SFTP guide here.
- Locate the Server’s
modsFolder:- In the server directory, find the
modsfolder. - If it doesn’t exist, create a new folder and name it
mods.
- In the server directory, find the
- Upload the Mod:
- Upload the same
.jarfile(s) from your computer’smodsfolder to the server’smodsfolder.
- Upload the same
6. How to Play with Others on your New NeoForge Server
Each user that plays on the server will need to install the mods on their own computer as well. To make it easier for other players and your friends, we recommend once you have all the mods you want to add them to a .zip file and distribute it to friends through Discord or other file sharing services. They’ll have to follow the NeoForge installation for their Minecraft client and place the .jar files into their own mods folder.
If this is not done, other players will not be able to connect to the server!
7. Troubleshooting and Support
Mods can introduce bugs or occasionally strain server performance. If mod conflicts or issues do arise:
a. Ensure all mods and the NeoForge version are compatible with your Minecraft version.
b. Check server logs for any error messages—they usually indicate which mod is causing issues.
c. Try adding mods one by one to isolate any problematic mods.
If you’re looking for an easy-to-manage server solution, Campfire Hosting offers a seamless experience. You only pay for the time you play, making it cost-effective for modded Minecraft gameplay! We also offer free support for mod related issues. Have fun!
![5 New NeoForge Modpacks for your next Minecraft session [Vanilla+]](https://blog.campfirehosting.com/wp-content/uploads/2025/11/hbjCwjR.jpeg)